Managing Clients
Your clients are the foundation of CountedIn. Add them, choose how they pay, organize them with tags, and keep all their information in one place.
The client list
The Clients page shows all your clients at a glance. Each client card displays their name, billing type, and a quick summary of their status: remaining credits for package clients, total sessions for per-session clients, or billing info for monthly clients.
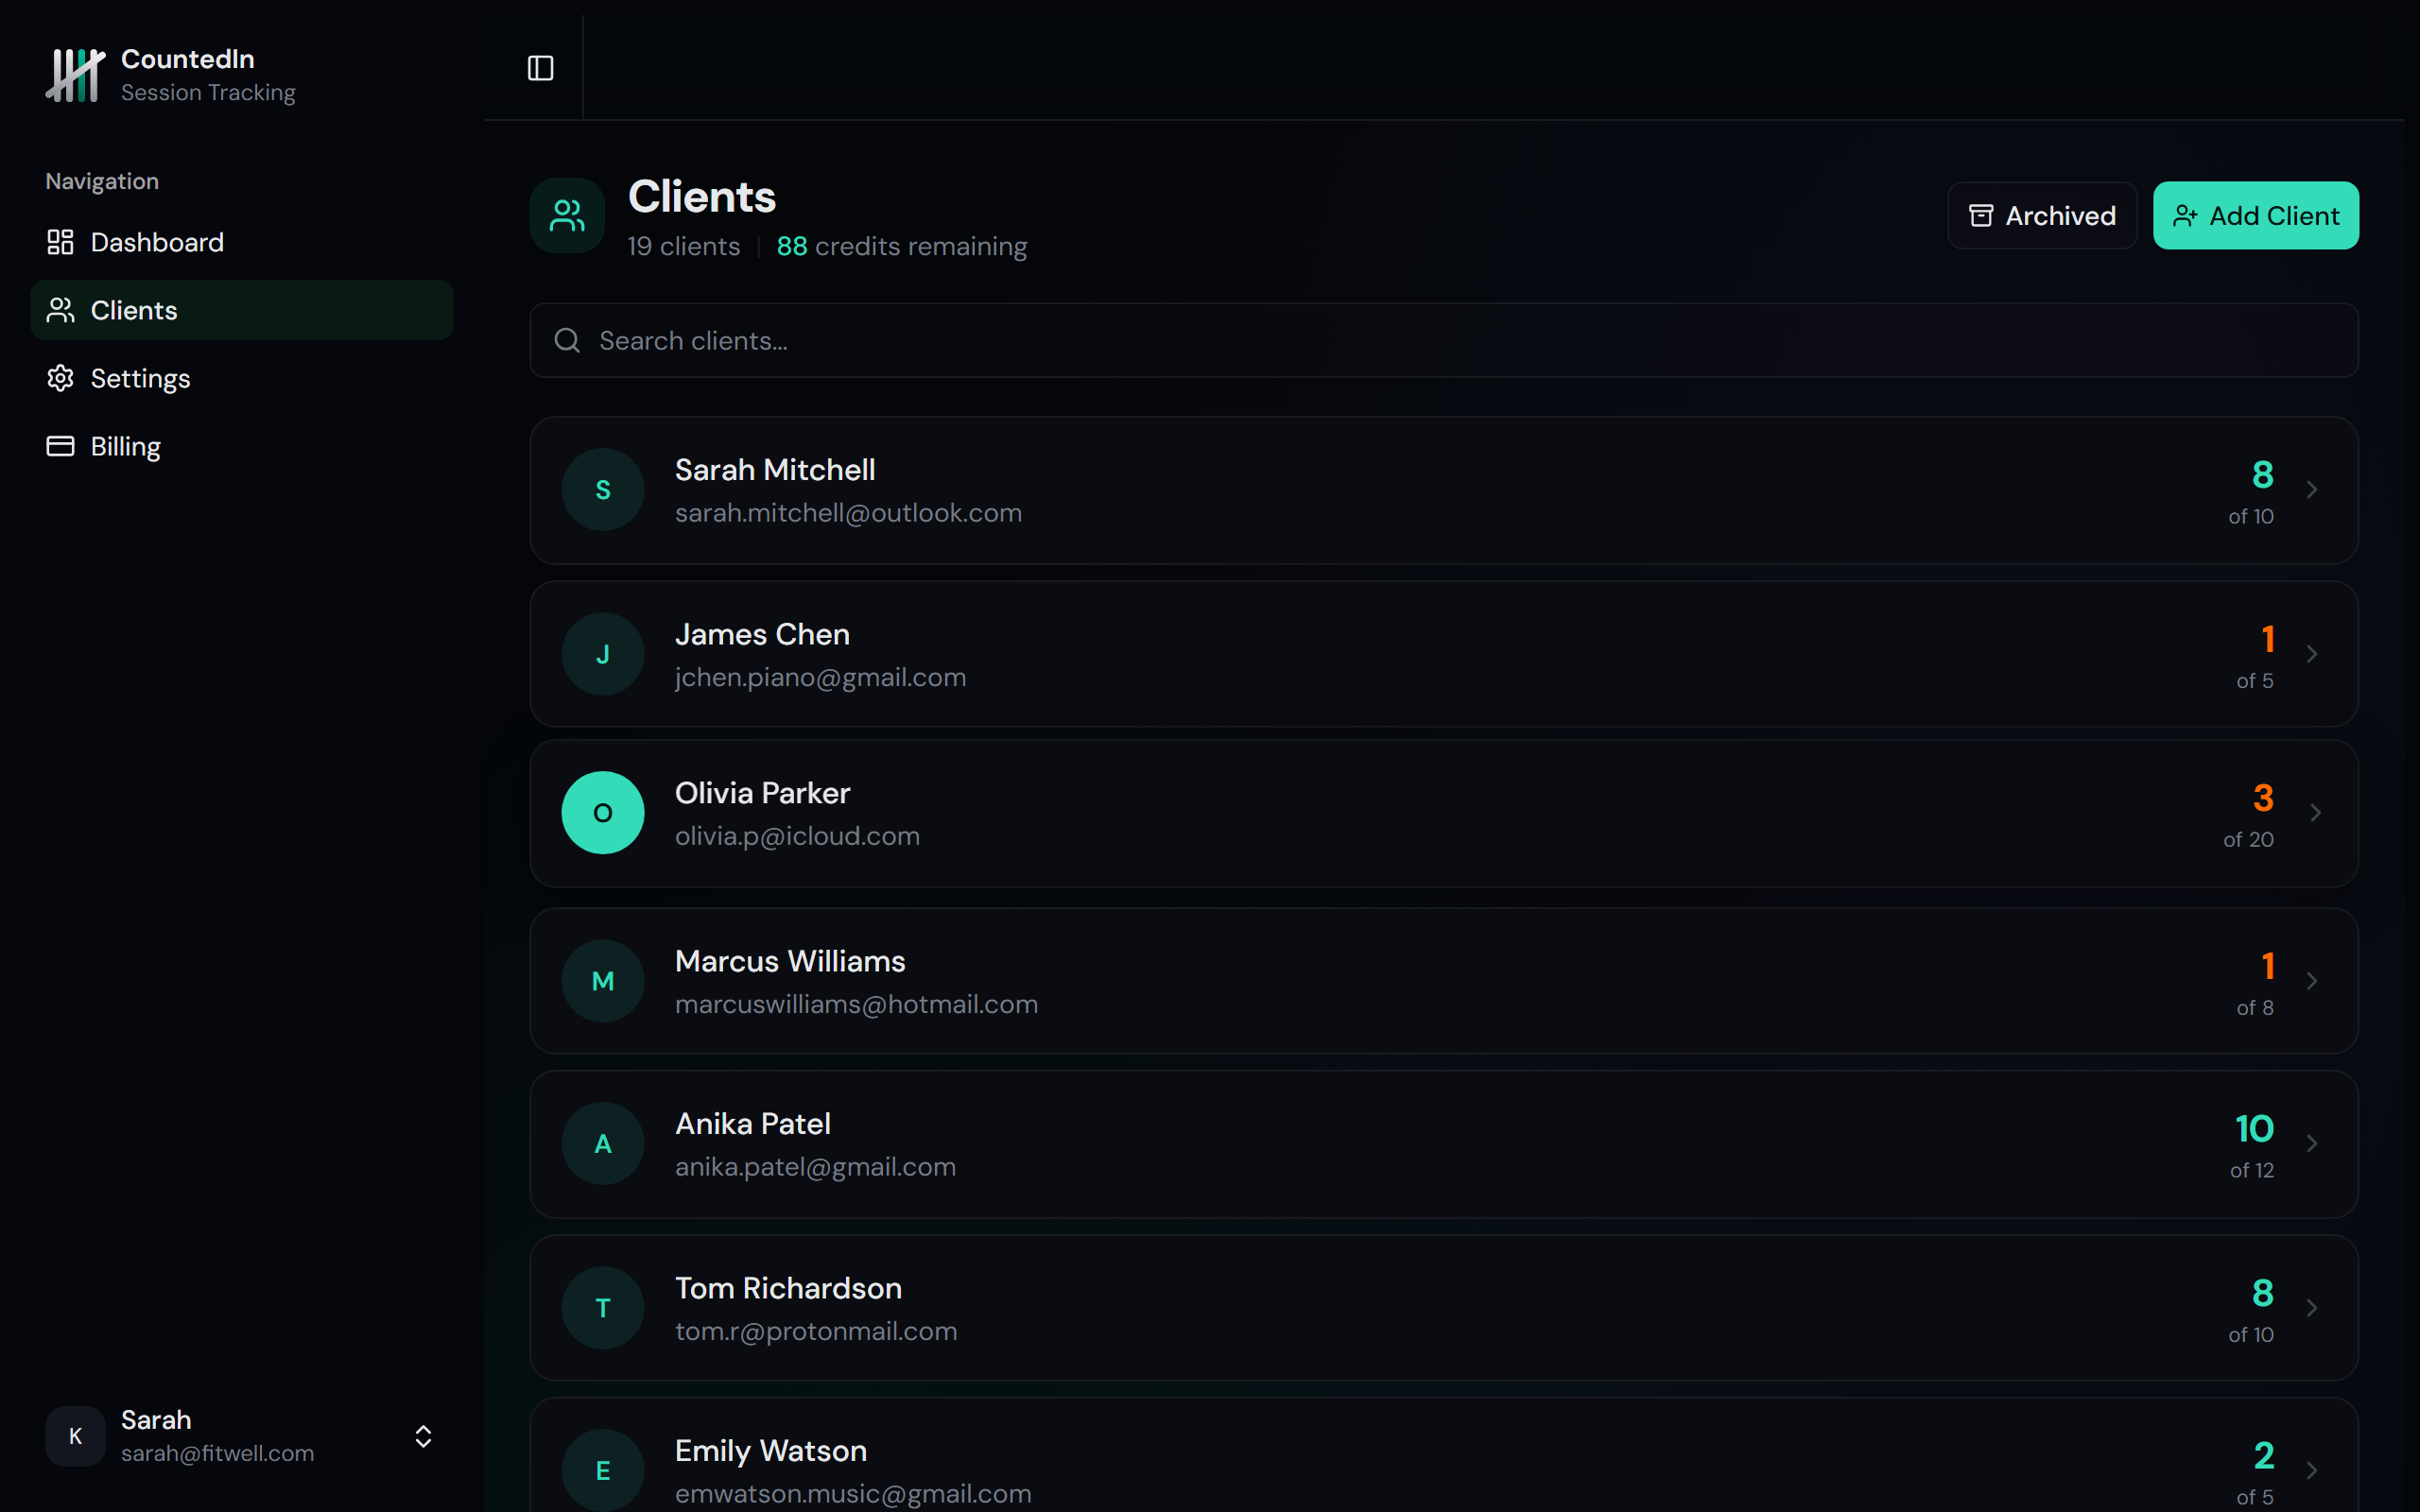
Use the search bar at the top to find clients quickly by name. The Active/Archived toggle lets you switch between current and past clients.
Adding a new client
Click the Add Client button at the top of the client list. An inline form appears right on the page where you enter their details and choose their billing type.
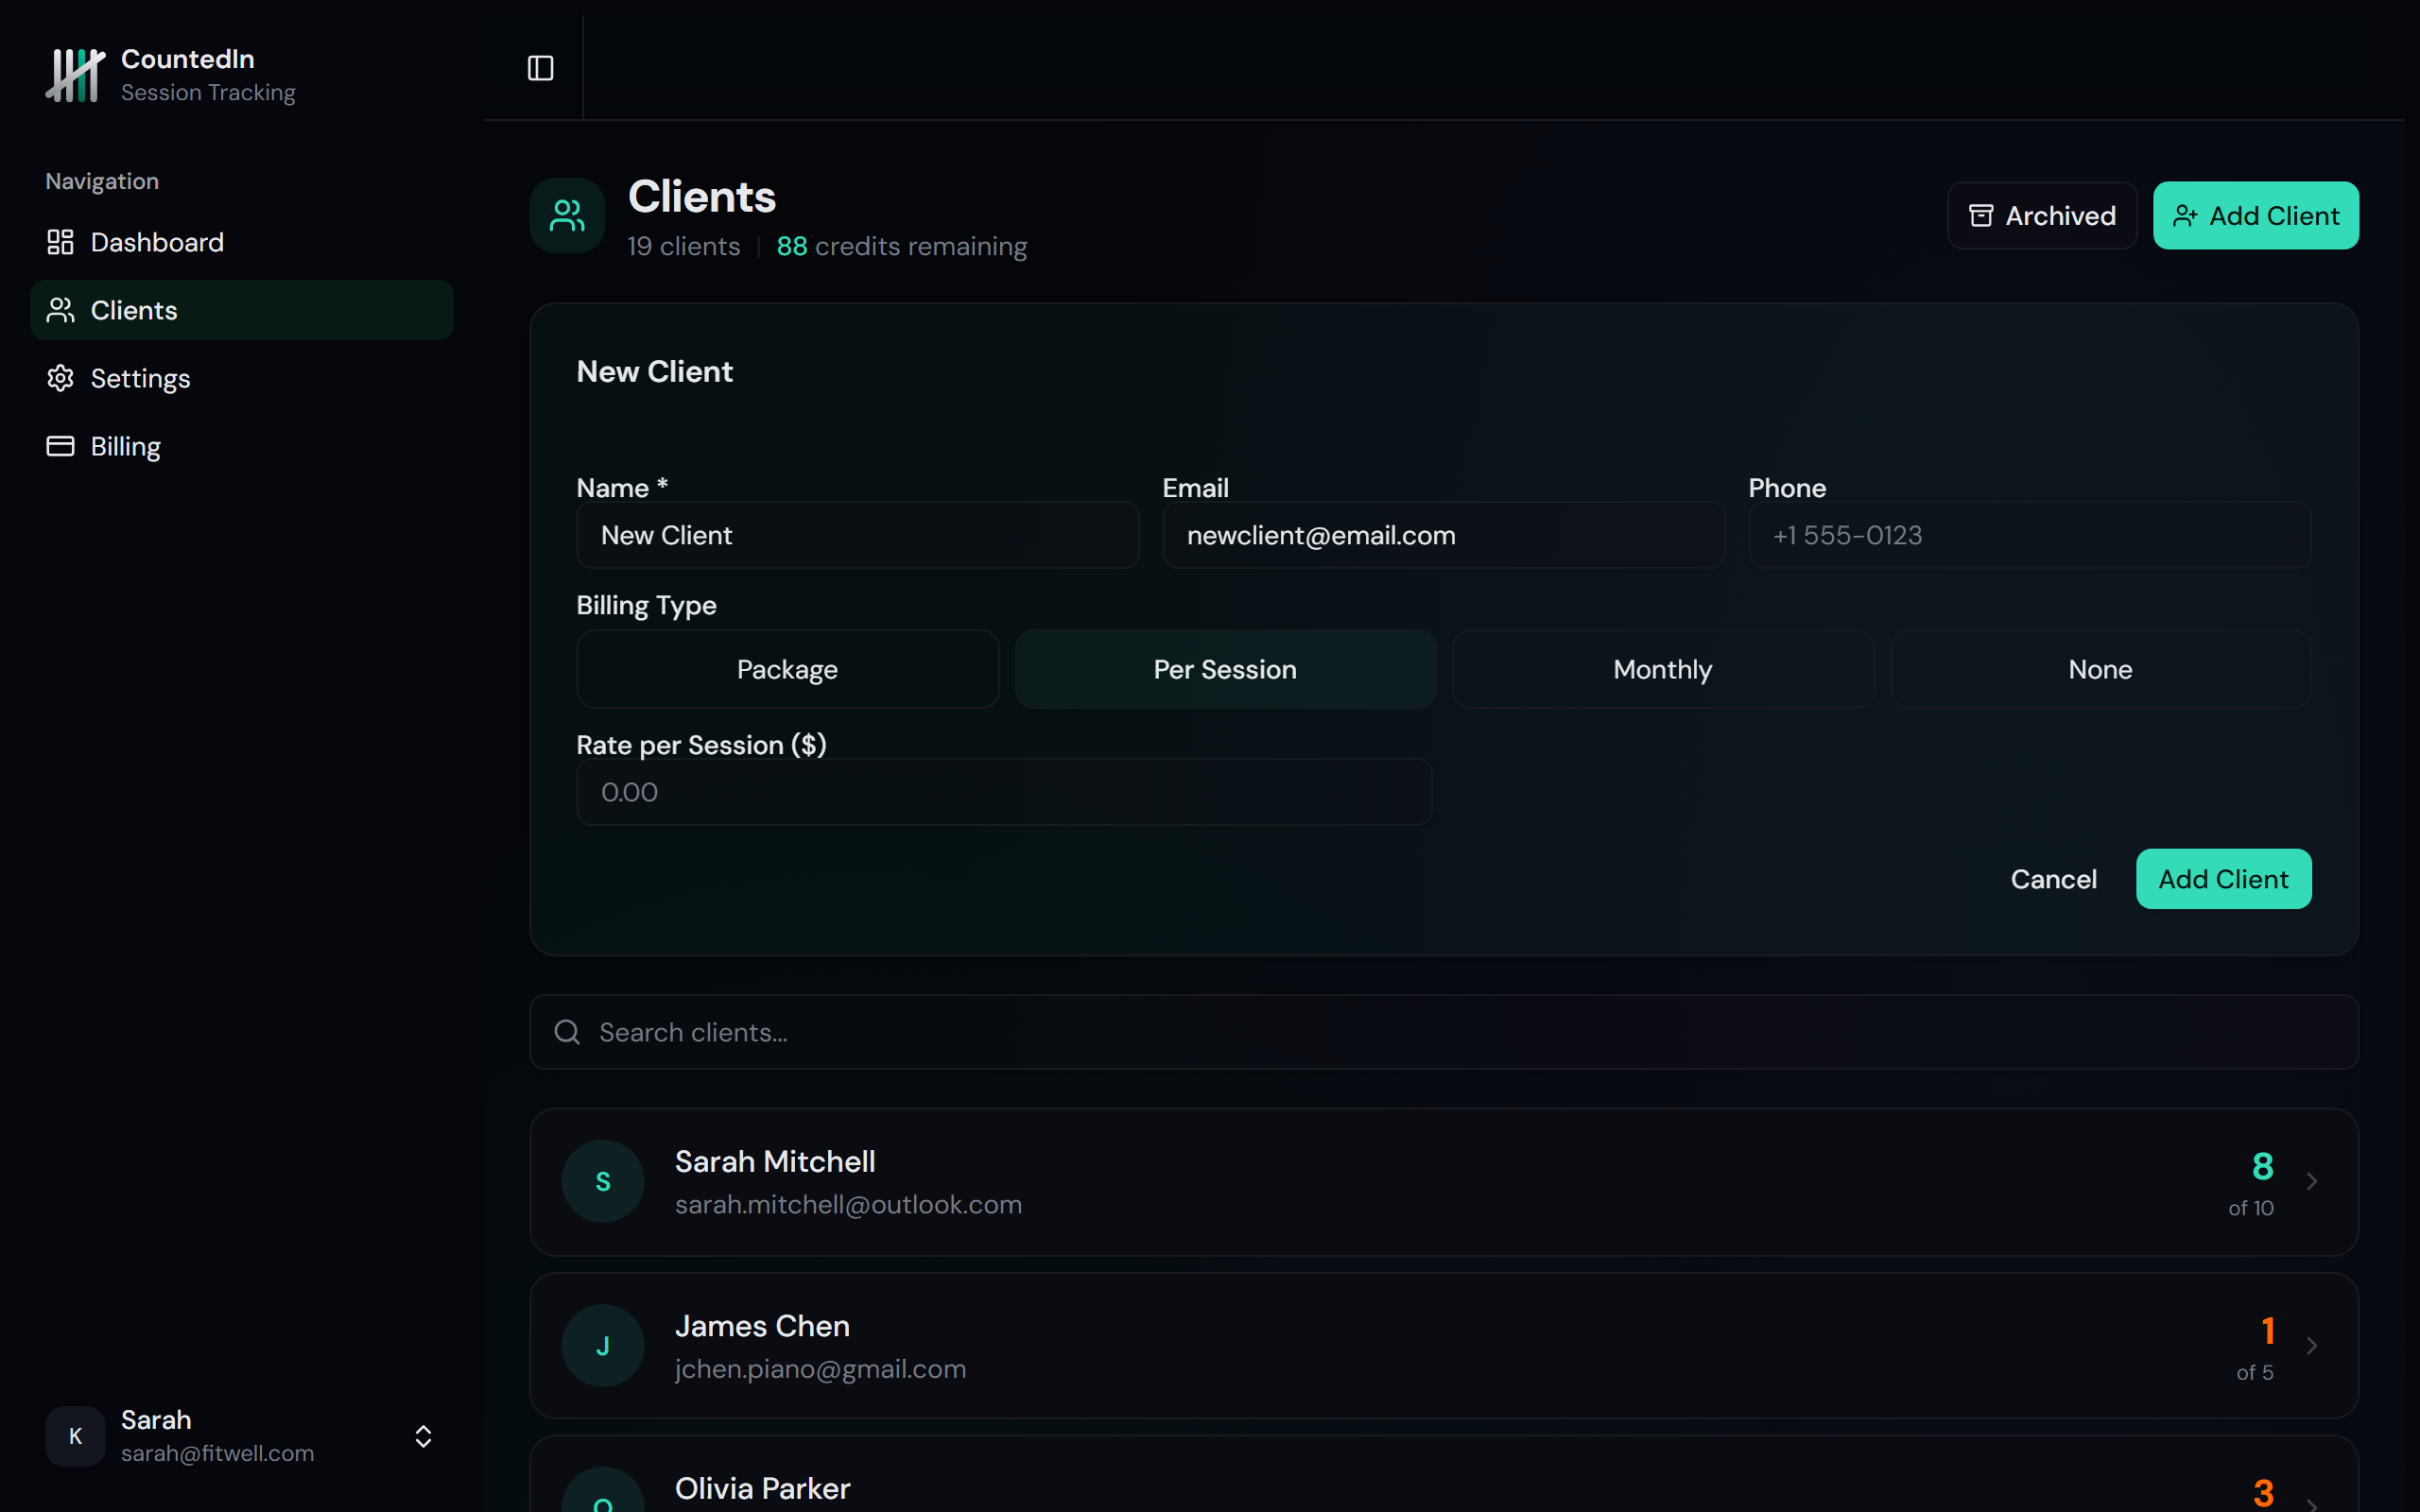
Enter their name
Add contact info (optional)
Choose a billing type
Click Add
Billing types
Every client has a billing type that determines how you track and charge for sessions. You set this when creating a client, and you can change it anytime.
Package
The client buys prepaid session packages. Each time you log a session, one credit is deducted. When credits run out, it's time to buy another package. This is the default and most common billing type.
Per Session
The client pays for each session individually (or in small batches). Sessions are logged without any package. You set a rate per session so you can track earnings and record payments as they come in.
Monthly
The client pays a flat monthly fee for sessions. You set the monthly rate and the day of the month payment is due. CountedIn tracks whether each month's payment has been received and alerts you when payments are due or overdue.
None
No billing. Use this for pro bono clients, community programs, trial periods, or anyone you train without charging. Sessions are tracked but no payment tracking applies.
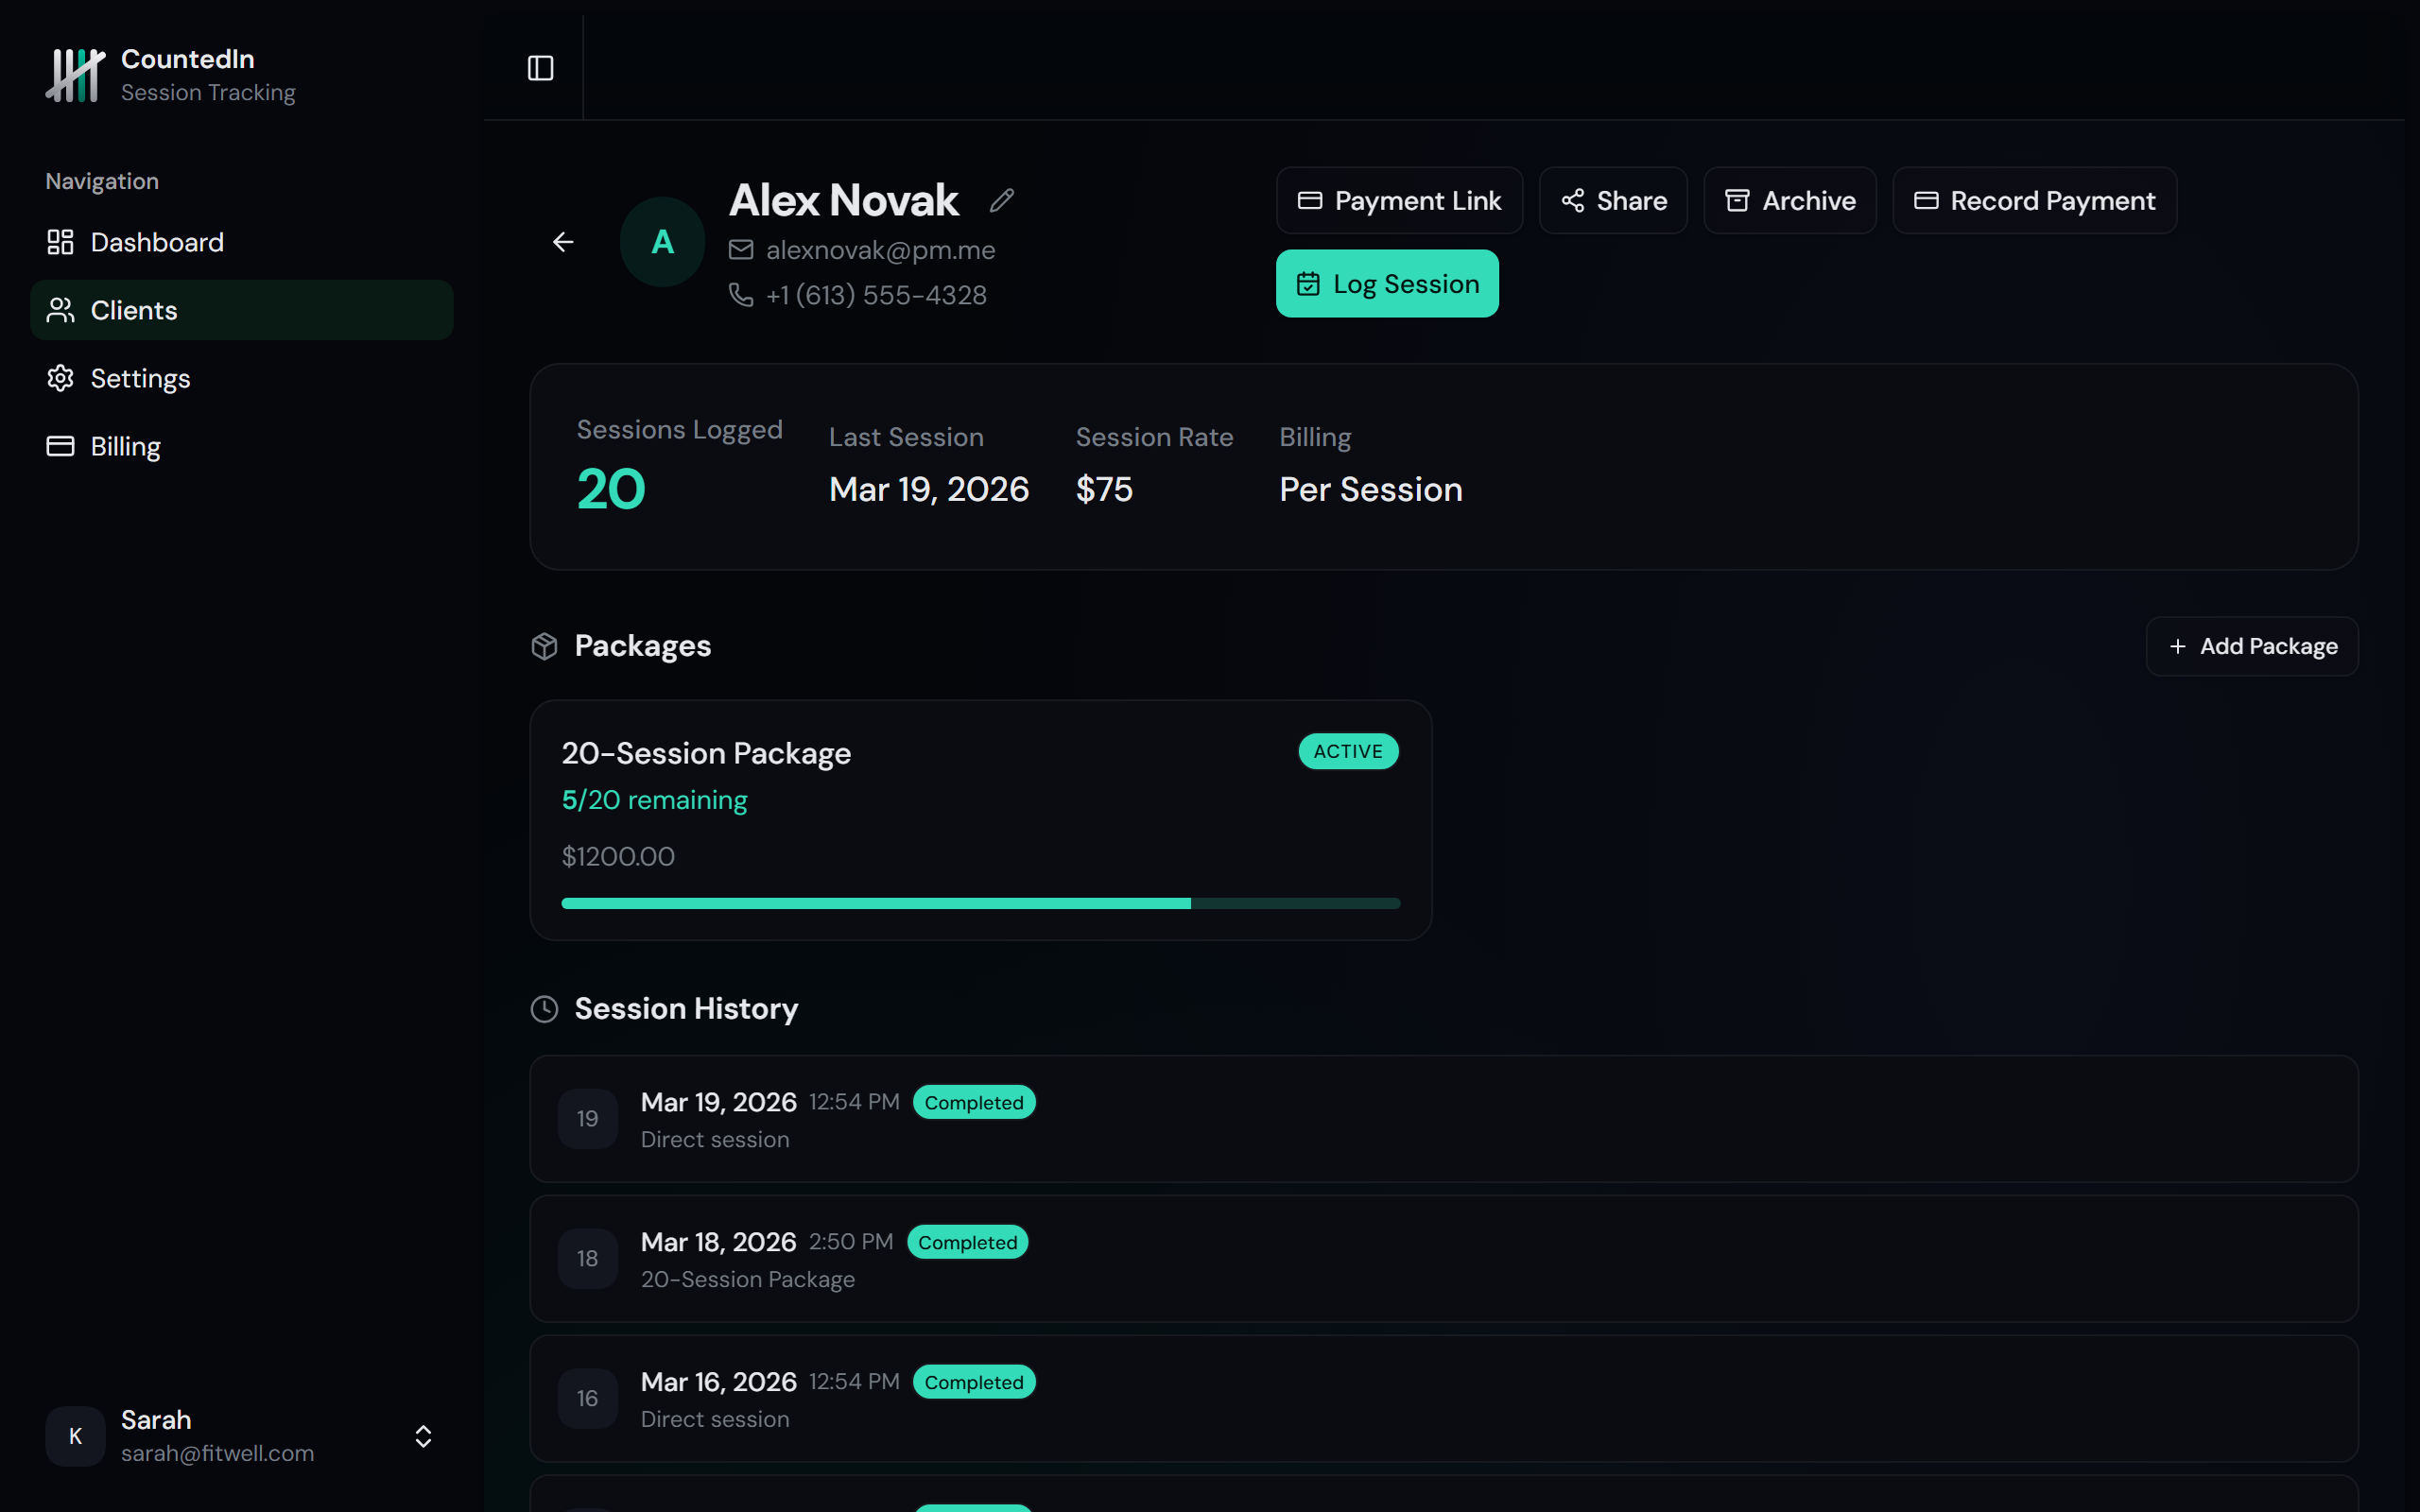
Client profile
Click any client in the list to open their full profile. The profile adapts based on the client's billing type.

For package clients, you'll see their credit overview, active packages with progress bars, and full session history. For per-session and monthly clients, you'll see their session count, billing rate, and a Record Payment button for tracking manual payments.
Recording payments
For per-session and monthly clients, use the Record Payment button to log payments received via cash, Venmo, bank transfer, or other methods.
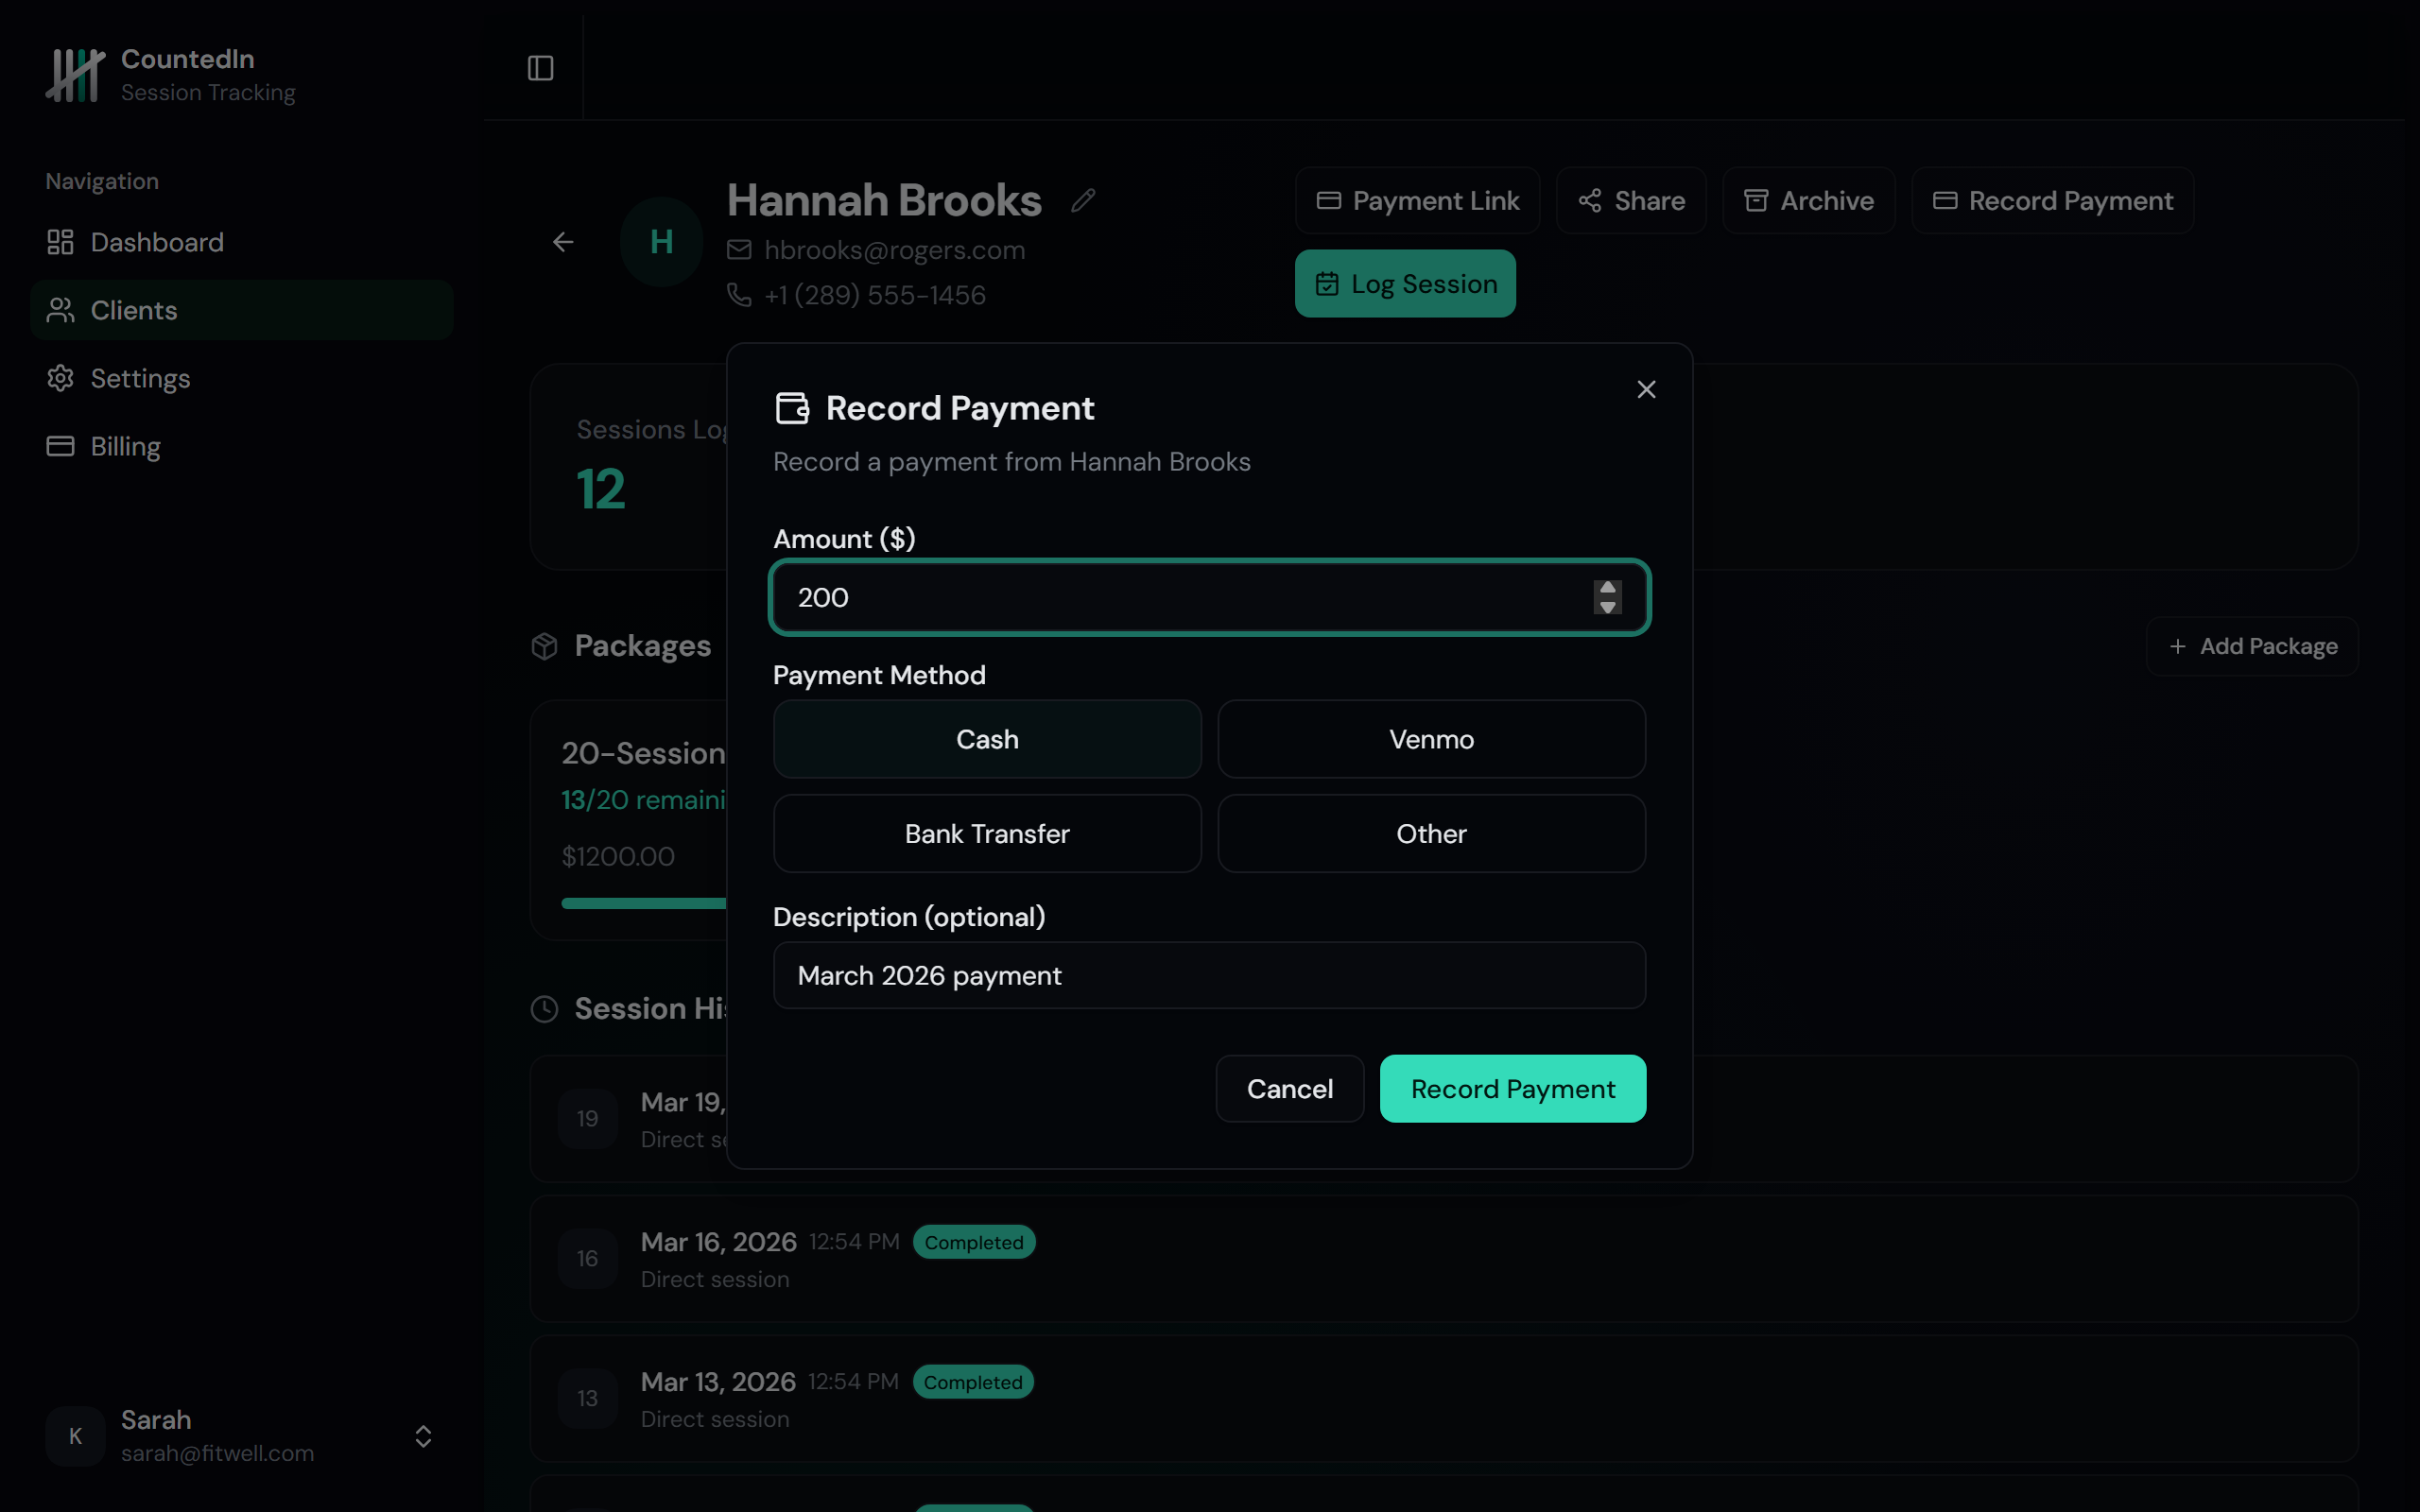
The payment amount pre-fills based on the client's billing rate. For monthly clients, the description auto-fills with the current month. All recorded payments appear in the activity feed and count toward your dashboard revenue.
Tags and notes
Add tags to organize your clients into groups. Common examples:
Tags are shared across your account, so once you create a tag, it's available for all clients. Use them to filter your client list and stay organized as your practice grows.
Archiving and reactivating
When a client stops training, archive them instead of deleting. Archived clients are hidden from your active list but their full history is preserved. You can reactivate them anytime if they come back.
To archive: open the client's profile and click the Archive button. To see archived clients, use the Archived toggle on the client list page.